Render a Specific Scene From a Blend File
Choose which Blender scene a RenderGod job renders and learn which settings reload from that scene, so multi-scene .blend files render exactly as intended.
When a .blend file has more than one scene, the Scene dropdown lets you render a specific scene instead of the one that was active when the file was saved. Switching scenes reloads that scene's own cameras, view layers and render settings into the job.
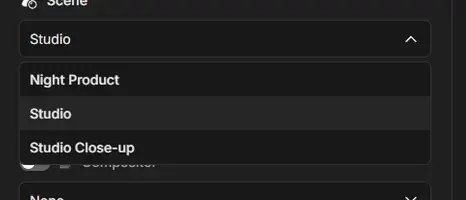
Pick the scene to render
- Select the job in the queue.
- Open the Scene dropdown near the top of the render settings panel.
- Choose a scene. The list contains every scene in the
.blendfile.
New jobs start on the scene that was active when the file was saved.
What changes when you switch scenes
Each Blender scene has its own settings, so RenderGod reloads them from the scene you pick:
| Reloaded from the new scene | Details |
|---|---|
| View layers, cameras, compositors, worlds | The dropdowns list what that scene contains |
| Frame range | From Frame and To Frame |
| Frame rate | Used for previews and Auto Create Video |
| Resolution | Width, height and percentage |
| Engine, samples, denoiser, noise threshold | Render settings card |
| Output format and color settings | Format returns to what that scene saves |
| Film Transparent | Under Advanced |
| Camera | Camera Binding Markers if the scene has cameras bound to markers, otherwise the scene's active camera |
| World Override | Turned off |
Render several scenes from one file
A job renders one scene. To render several scenes from the same .blend:
- Set up the job for the first scene.
- Duplicate the job.
- Choose the next scene on the copy.
Each job then shows its own scene on its card in the queue.
Scenes and the output folder
The Organized and Versioned templates include a Scene folder, so each scene's frames land in their own folder. See Choose where renders are saved.