Install the RenderGod Blender Add-on
Install the Send to RenderGod add-on into one or more Blender versions automatically from RenderGod, or download it and install it by hand in Blender.
Install the RenderGod Blender add-on from inside RenderGod: pick your Blender versions, click install, restart Blender. If automatic install is not an option, download the add-on file and install it from Blender's preferences.
Before you start
- Blender 4.2 or newer, listed in the Blender Version Manager.
- Open RenderGod at least once on this computer before using the add-on.
- Save any work open in Blender. The restart step closes every running Blender.
Install automatically
Open Settings > Install Blender Addon. You can also choose Install Addon from the Import menu of the queue, or click Install Addon on the reminder shown when the queue is empty.
Under Choose Blender Versions, leave selected the versions that should get the add-on. All are selected at first; click a chip to deselect it.
Click Download & Auto-Install. The button shows "Installing..." while RenderGod installs and enables the add-on in each version. This can take up to a minute per version.
When "Addon Installed Successfully!" appears, save your work in Blender and click Restart Blender (Required).
Click Confirm Restart Blender (Click Again). Blender closes and opens again, and "Blender has been restarted. The addon should now be active." confirms it.
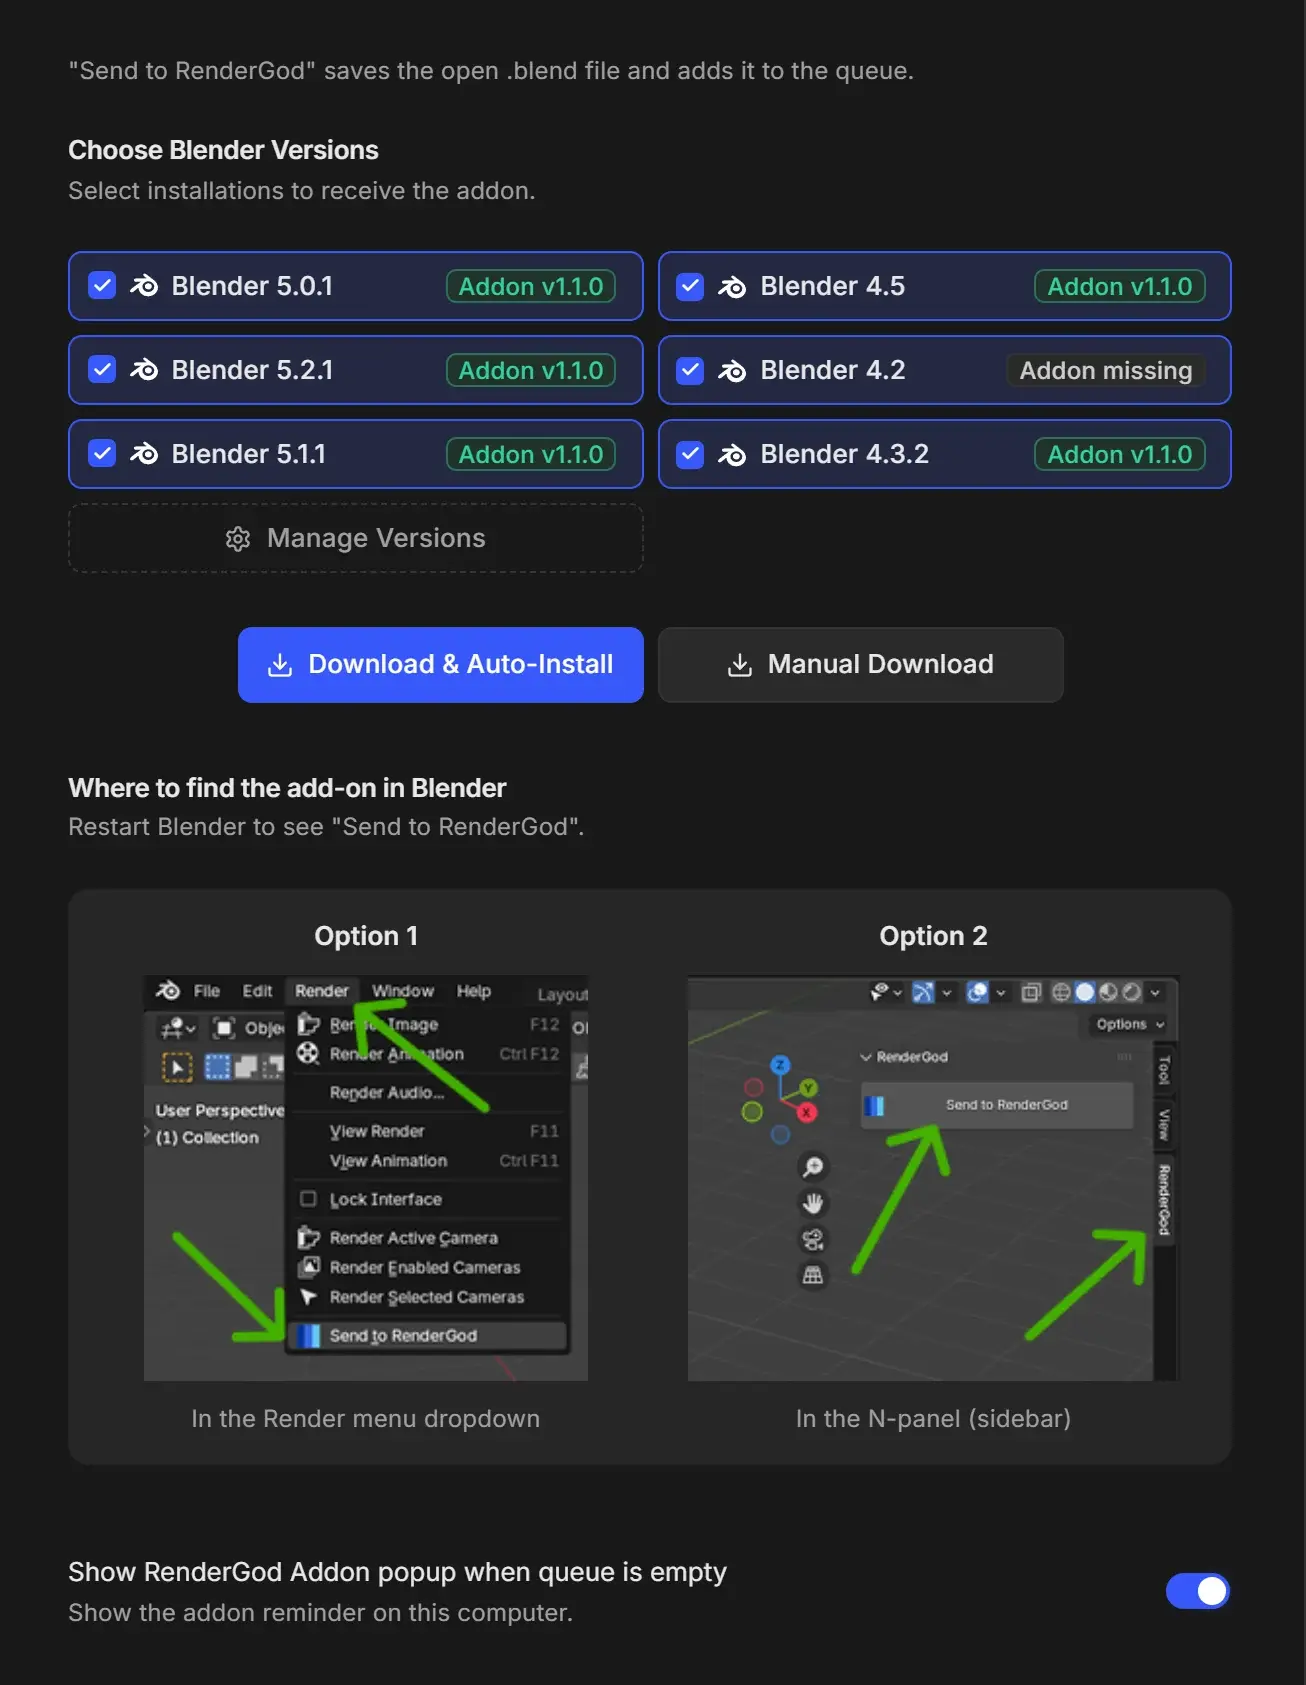
Each version chip then shows Addon v followed by the installed version number. If some versions failed, the "Couldn't install the add-on" panel explains why; close Blender and click Retry.
Install manually
Use this when you want to install the add-on on a Blender RenderGod does not list, or prefer to do it yourself.
In Settings > Install Blender Addon, click Manual Download and save rendergod_shell_addon.py.
In Blender, open Edit > Preferences > Add-ons.
Click the drop-down arrow at the top right of the Add-ons list and choose Install from Disk…. Select the saved file.
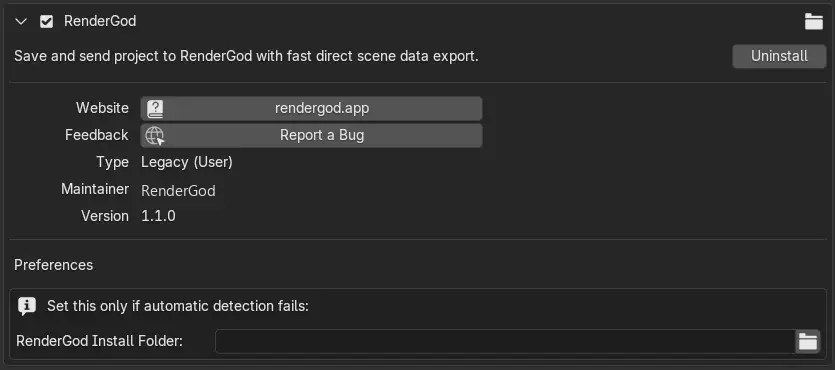
Make sure the RenderGod add-on is ticked. Blender saves the change if Auto-Save Preferences is on; otherwise use Save Preferences from the menu at the bottom left.
Check the add-on is installed
- In Blender, press N in the 3D Viewport. A RenderGod tab with Send to RenderGod appears.
- Open the Render menu. Send to RenderGod is the last item.
- In Edit > Preferences > Add-ons, search for "RenderGod" to see the entry and its version.
Turn off the empty queue reminder
When the queue is empty RenderGod reminds you about the add-on. Once it is installed, turn off Show RenderGod Addon popup when queue is empty at the bottom of Settings > Install Blender Addon.