Video to Image Sequence Conversion
Convert video files into image sequences, extracting individual frames from video files for editing, compositing, or further processing.
Video to Image Sequence Conversion
Convert video files into image sequences, extracting individual frames from video files for editing, compositing, or further processing.
Overview
The Video to Image Sequence feature allows you to extract frames from video files, creating a numbered sequence of images. This is essential for frame-by-frame editing, compositing workflows, and video analysis.
Import Methods
You can import video files using the same methods as other file types:
Method 1: Drag and Drop
- Drag a video file from Windows File Explorer
- Drop it onto the RenderGod window
- A Video to Image Sequence job is automatically created
Method 2: Import Button
- Click "Import Video" button
- Select video file(s) from the file dialog
- Video files are added to the queue
For detailed import instructions, see the "Importing Video Files" section.
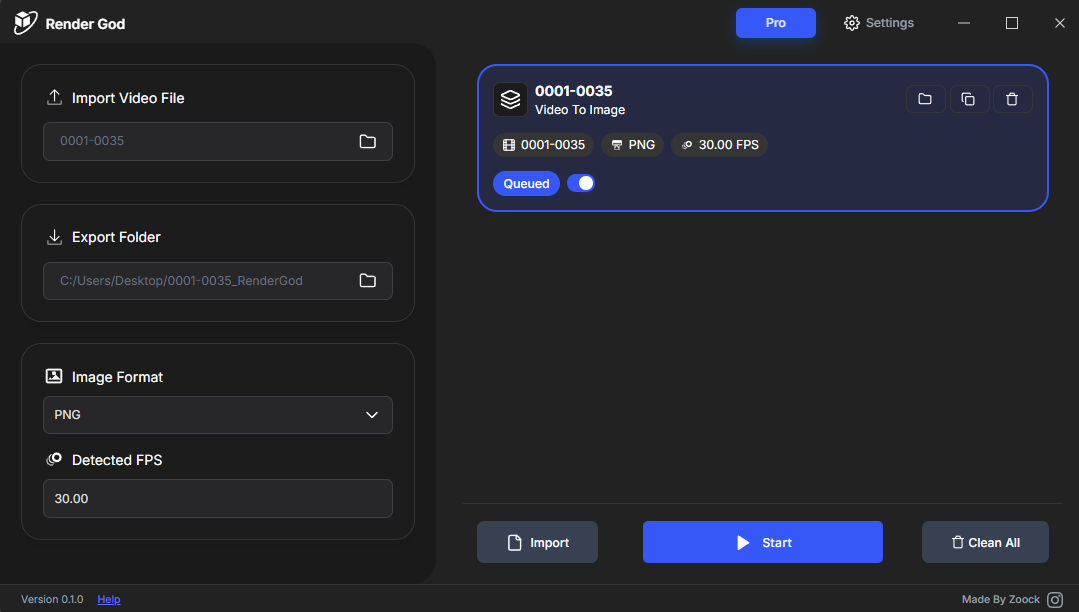
Job Configuration
When you import a video file, a new job card appears in the queue with configurable options:
Export Folder
Default behavior: RenderGod creates a new folder in the same location as your video file. The folder is named after the video file and will contain all extracted image frames.
Custom path: You can change the export folder to any location you prefer.
Image Format Selection
You can choose the format for your extracted image sequence:
- PNG + Alpha: Preserves transparency if available in video
- PNG: Standard PNG format with lossless compression
- EXR Lossless (ZIP): Professional format with HDR support
- EXR Fast (DWAA): Faster EXR encoding
- EXR Uncompressed: Maximum quality EXR
- JPEG Baseline: Standard JPEG compression
- JPEG Progressive: Progressive JPEG loading
- JPEG Fastest: Fastest encoding, lower quality
Frame Rate Detection
Automatic detection: RenderGod automatically detects the frame rate (FPS) from your video file. This ensures:
- Accurate extraction: Each frame is extracted at correct timing
- Proper sequencing: Frames are numbered correctly
- No manual input: FPS is set automatically
- Manual override: You can override the detected FPS if needed
Default Settings
You can configure default settings for video to image sequence conversion:
- Go to Settings > Default Settings
- Find the Video to Image Sequence section
- Set your preferred default image format
- Configure default export folder behavior
These defaults apply to all new video imports, but you can customize each job individually.
Multiple Video Files
You can import multiple video files:
- Batch import: Import multiple videos at once
- Individual jobs: Each video becomes a separate job
- Independent settings: Each job can have different settings
- Batch processing: Process all videos in the queue
Output Structure
After conversion, your export folder contains:
- Numbered sequence: 0001.png, 0002.png, 0003.png, etc.
- Sequential naming: Frames numbered sequentially
- Consistent format: All frames in the selected format
- Ready for use: Frames ready for import into other software
Best Practices
Before Conversion
- Check video file: Ensure video plays correctly
- Verify disk space: Image sequences can be large
- Choose format: Select appropriate format for your needs
- Plan storage: Ensure sufficient storage space
Format Selection
- PNG: Use for lossless quality, general use
- EXR: Use for professional compositing with HDR
- JPEG: Use when file size is more important than quality
- Alpha channel: Use PNG + Alpha if you need transparency
After Conversion
- Verify output: Check that all frames were extracted
- Review quality: Ensure extracted frames meet quality requirements
- Organize files: Organize image sequence if needed
- Archive source: Consider archiving source video if needed
Workflow Integration
Typical Workflow
- Import video: Add video file to queue
- Configure settings: Set image format and export folder
- Start conversion: Begin frame extraction
- Access frames: Open export folder to access image sequence
- Use in software: Import sequence into editing/compositing software
Related Features
- Image Sequence to Video: Convert sequences back to video
- Default Settings: Configure default formats and paths
- Queue Management: Manage multiple conversion jobs
- Import Methods: Various ways to import video files
Your video files are ready to be converted to image sequences!
© 2026 RenderGod. All rights reserved.