Image Sequence to Video Conversion
Convert image sequence folders into video files, creating playable video files from rendered frames or extracted video frames.
Image Sequence to Video Conversion
Convert image sequence folders into video files, creating playable video files from rendered frames or extracted video frames.
Overview
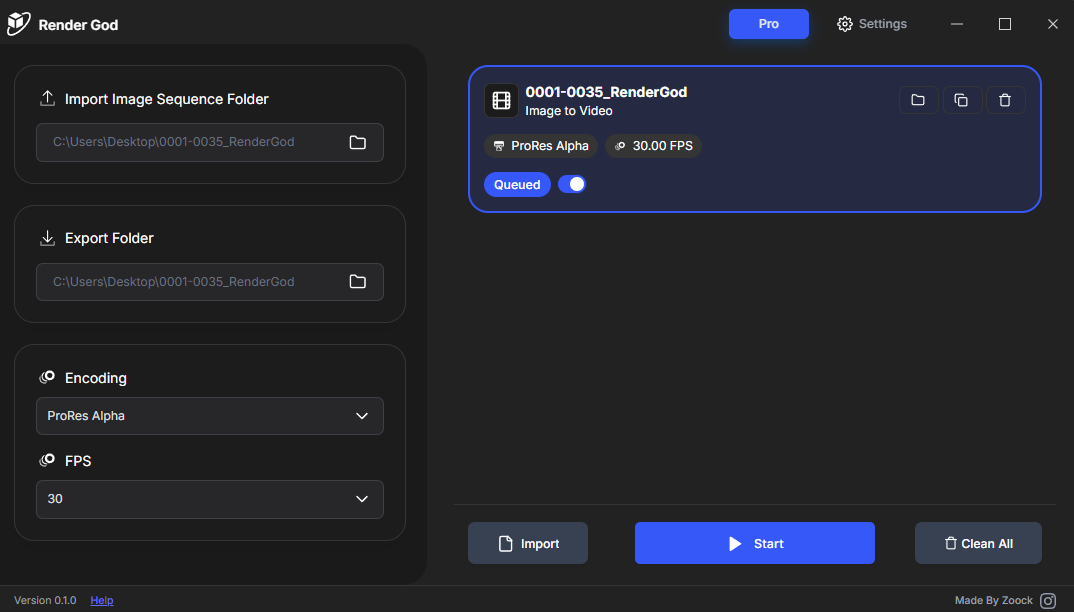
The Image Sequence to Video feature allows you to combine numbered image files into a single video file. This is essential for creating final video outputs from rendered animation frames or reassembling extracted video frames.
Import Methods
You can import image sequence folders using the same methods as other file types:
Method 1: Drag and Drop
- Drag an image sequence folder from Windows File Explorer
- Drop it onto the RenderGod window
- An "Image Sequence to Video" job is automatically created
Method 2: Import Button
- Click "Import Image Sequence" button
- Select the folder containing your image sequence
- The folder is added to the queue
For detailed import instructions, see the "Importing Image Sequences" section.
Job Configuration
When you import an image sequence folder, a new job card appears with configurable options:
Video Format (Encoding)
Choose the video codec and format for your output:
- ProRes 422HQ: High quality professional format (large file size)
- ProRes 422: Standard ProRes format (good quality, smaller than 422HQ)
- H.264 16Mbps: High quality H.264 encoding (good balance)
- H.264 50Mbps: Higher bitrate H.264 (better quality)
- H.264 Web Optimized: Optimized for web delivery (smaller file size)
Frame Rate (FPS)
Set the frame rate for your output video:
- Auto-detect: RenderGod attempts to detect FPS from file naming
- Manual entry: Enter your desired frame rate (common: 24, 25, 30, 60 fps)
- Default: Uses default FPS setting from your preferences
Important: Match the frame rate to your original animation or project settings for proper playback speed.
Output Location
Configure where your video file will be saved:
- Default: Saves in the same folder as the image sequence
- Custom: Specify a different output location
- File naming: Output video uses folder name or custom name
Default Settings
You can configure default settings for image sequence to video conversion:
- Go to Settings > Default Settings
- Find the Image Sequence to Video section
- Set your preferred default video format
- Configure default frame rate
- Set default output location behavior
These defaults apply to all new imports, but you can customize each job individually.
Supported Image Formats
RenderGod supports all common image sequence formats:
- PNG (with or without alpha channel)
- JPEG/JPG
- EXR (various compression methods)
- TIFF
- And other formats supported by FFmpeg
Image Sequence Requirements
For proper conversion, your image sequence should:
- Be in a single folder: All images must be in one directory
- Have sequential numbering: Files numbered sequentially (e.g., 0001.png, 0002.png)
- Use consistent naming: Maintain consistent file naming throughout
- Be complete: Ensure no frames are missing from the sequence
Output File
After conversion, you'll have:
- Single video file: All frames combined into one video
- Proper frame rate: Video plays at correct speed
- Selected format: Video uses your chosen codec and settings
- Ready for use: Video ready for playback, editing, or distribution
Best Practices
Before Conversion
- Verify sequence: Ensure all frames are present and numbered correctly
- Check format: Verify all images use the same format
- Organize folder: Ensure folder contains only sequence images
- Set frame rate: Configure correct frame rate for your project
Format Selection
- ProRes: Use for professional workflows, high quality
- H.264: Use for general use, good quality
- Web Optimized: Use for online distribution
- Match delivery: Choose format that matches your delivery needs
After Conversion
- Verify video: Check that video plays correctly
- Review quality: Ensure video quality meets requirements
- Check frame rate: Verify playback speed is correct
- Test compatibility: Test video in target playback software
Workflow Integration
Typical Workflow
- Render frames: Render animation frames as image sequence
- Import folder: Import image sequence folder into RenderGod
- Configure settings: Select video format and frame rate
- Start conversion: Create video from image sequence
- Access video: Find completed video in output location
Related Features
- Auto Image Sequence to Video: Automatically convert Blender renders to video
- Video to Image Sequence: Convert videos to image sequences
- Default Settings: Configure default formats and frame rates
- Queue Management: Process multiple conversions efficiently
Your image sequences are ready to be converted to video files!
© 2026 RenderGod. All rights reserved.